


Don't like ads? Go Ad-Free Today
Accurate Measurements: Your Key to Successful Home Improvement Projects
Embarking on any renovation requires precise planning, and the cornerstone of that planning is accurate measurements. Whether you’re a seasoned DIYer or just starting, knowing how to measure for home improvement tasks like flooring or painting saves time, money, and prevents frustrating errors. Getting your dimensions right ensures you buy exactly what you need, avoiding costly overages or frustrating shortages.
Essential Tools for Precise Measuring
Before you begin, gather the right tools. Having the correct equipment makes the job easier and far more accurate.
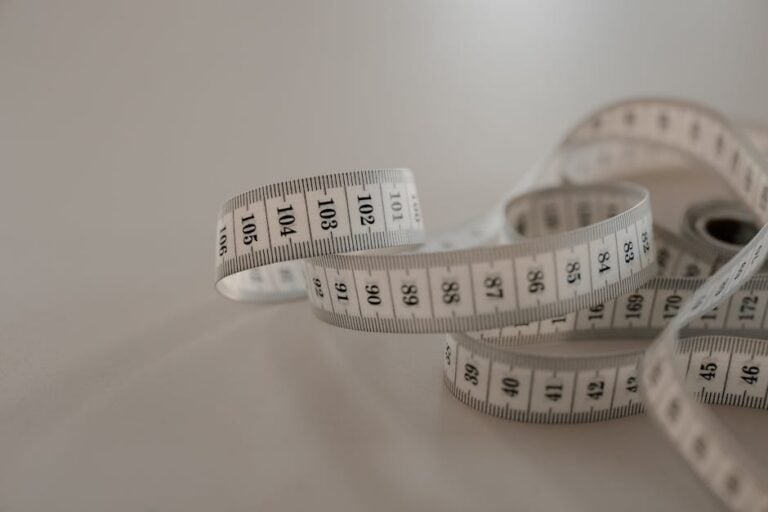
- Tape Measure: A standard 25-foot retractable steel tape measure is indispensable. Look for one with clear markings and a sturdy hook.
- Laser Distance Measurer: For larger rooms or high ceilings, a laser measure offers speed and accuracy. It’s especially useful for one-person jobs.
- Pencil and Notepad: Always jot down measurements immediately to avoid confusion. Label them clearly (e.g., “Living Room Length,” “Kitchen Width”).
- Calculator: For crunching numbers and converting units, a simple calculator or your phone’s calculator app is essential.
- Straightedge or Level: Useful for marking straight lines or ensuring your measuring tape is truly level across a long span.
Step-by-Step: Measuring Your Room Dimensions
Understanding the basic dimensions of your space is the first step for nearly any project, from furniture layout to major renovations.
Measuring Length and Width
For rectangular or square rooms, measuring length and width is straightforward. Always measure from wall to wall, not baseboard to baseboard, as baseboards can vary in thickness.
- Start at one corner: Place the end of your tape measure firmly against the wall.
- Extend the tape: Pull the tape measure straight across the room to the opposite wall. Ensure it’s taut and not sagging.
- Read the measurement: Note the exact measurement down to the nearest 1/8 or 1/16 of an inch.
- Repeat for width: Measure the perpendicular wall in the same manner.
- Double-check: Measure each dimension twice, from different points if possible, to confirm accuracy.
For irregular-shaped rooms, break them down into smaller, manageable rectangles. Measure each segment and sketch it out on your notepad.
Measuring Height
Ceiling height is crucial for projects like painting, installing crown molding, or new light fixtures.
- Floor to ceiling: Measure from the finished floor surface straight up to the ceiling.
- Multiple points: Measure height in several spots around the room, especially in older homes, as floors and ceilings can be uneven. Use the largest measurement if you need uniform coverage, or average them for a general idea.
Calculating for Flooring: Square Footage
When laying new flooring, you’ll need to determine the total square footage of the area. This is where your length and width measurements come into play.
Simple Rectangular Rooms
Calculating square footage for a rectangular room is basic multiplication:
Square Footage = Length (ft) × Width (ft)
For example, a room that is 10 feet long and 12 feet wide would be 120 square feet (10 ft x 12 ft = 120 sq ft). For easy calculations of square or rectangular areas, especially if you’re dealing with various room shapes, a tool like the Area of Square Calculator on iotools.cloud can be incredibly helpful.
Irregularly Shaped Rooms and Alcoves
Break down complex shapes into simple rectangles or squares. Measure each section individually, calculate its square footage, and then add them all together.
| Area Section | Length (ft) | Width (ft) | Square Footage (sq ft) |
|---|---|---|---|
| Main Room | 15 | 10 | 150 |
| Alcove 1 | 3 | 4 | 12 |
| Alcove 2 | 2 | 5 | 10 |
| Total Square Footage: | 172 | ||
Always add 5-15% extra for waste, cuts, and future repairs. The exact percentage depends on the flooring type and room complexity. For instance, intricate tile patterns or angled cuts might require more waste.
Calculating for Painting: Wall Area
Estimating paint quantities means calculating the total surface area of your walls, often measured in square feet.
Measuring Walls
- Find room perimeter: Add up the length of all walls in the room.
Perimeter = (Length × 2) + (Width × 2) - Calculate total wall area: Multiply the room’s perimeter by its height.
Total Wall Area = Perimeter × Height
For a room 10 ft long, 12 ft wide, and 8 ft high:
- Perimeter = (10 ft × 2) + (12 ft × 2) = 20 ft + 24 ft = 44 ft
- Total Wall Area = 44 ft × 8 ft = 352 sq ft
Subtracting Openings
Don’t forget to subtract the area of doors and windows, as you won’t be painting these surfaces.
- Measure the length and width of each door and window.
- Calculate their individual square footage (Length × Width).
- Sum these areas and subtract from your total wall area.
A standard gallon of paint typically covers about 350-400 square feet with one coat. Remember to account for multiple coats when buying paint.
Tips for Maximum Accuracy and Common Mistakes to Avoid
Precision is paramount in home improvement. Follow these tips to ensure your measurements are as accurate as possible and avoid common pitfalls.
Maximize Accuracy
- Measure Twice (or Thrice!): Always double-check every measurement. If possible, have someone else measure independently to compare notes.
- Measure to the Nearest Smallest Unit: Even if you only need rough estimates, noting down precise fractions (e.g., 6′ 3 1/4″) will give you a more accurate starting point than rounding. You can round up or down later as needed for material ordering.
- Stay Consistent: Always measure from the same starting and ending points. For long distances, mark interim points to keep your tape straight.
- Account for Irregularities: Old houses rarely have perfectly square rooms. Measure diagonally from corner to corner; if the diagonal measurements aren’t equal, your room isn’t square. Factor this into your material ordering. You might need to adjust cuts or order slightly more material.
- Sketch it Out: Draw a simple diagram of your room, noting all measurements directly on the sketch. This visual aid helps organize your data and identify missing dimensions.
Avoid These Common Mistakes
- Rounding Prematurely: Don’t round numbers until you’ve completed all calculations. Rounding early can lead to significant cumulative errors.
- Assuming Standard Sizes: Never assume a door or window is a “standard” size without measuring it. Openings, especially in older homes, can vary wildly.
- Forgetting to Add Waste: Almost every material, from flooring to paint, requires a certain percentage of overage for cuts, errors, or future repairs. Neglecting this is a common and costly mistake. A good rule of thumb is 5-15% extra, depending on the material and complexity.
- Measuring Only Once: One quick measurement is a recipe for error. Always confirm your numbers.
- Not Accounting for Obstacles: Measure around obstacles like built-in cabinets, fireplaces, or irregular wall sections. Treat them as separate areas if necessary.
For more detailed guidance on specific project types, consider consulting resources like the HGTV guide on measuring a room or similar authoritative sources on home renovation best practices.
Take the Guesswork Out of Your Next Project
Mastering accurate measurements is a fundamental skill for any homeowner or DIY enthusiast. It empowers you to confidently plan, budget, and execute your projects, ensuring you get the right amount of materials every time. By following these straightforward steps and tips, you’ll minimize waste, save money, and achieve professional-looking results. Start your next home improvement project with confidence – measure smart, build better!


Want To enjoy an ad-free experience?
Go Ad-Free Today
Install Our Extensions
Add IO tools to your favorite browser for instant access and faster searching
恵 Scoreboard Has Arrived!
Scoreboard is a fun way to keep track of your games, all data is stored in your browser. More features are coming soon!
ADVERTISEMENT · REMOVE?
Must-Try Tools
View AllADVERTISEMENT · REMOVE?
New Arrivals
View AllUpdate: Our latest tool was added on Mar 29, 2026
Get Involved
Help us continue providing valuable free tools

ADVERTISEMENT · REMOVE?